The Endurance Nation team is busy building a “Ventum Army” as the fever has caught on with Ventum One. Myself and the recent teammates have joined the movement and are coming to Ventum from a variety of triathlon bikes: Trek Speed Concept, Cervelo P5’s, Dimond, Felt, Specialized and others. This review is based on my and their experience with the Ventum.
The relationship began by giving Ventum the fit coordinates from my Cervelo P3 and they recommended the Ventum One 51cm frameset. The frameset includes frame, fork, seatpost, front brake, and their stem and aerobar setup. In my opinion, the inclusion of the aerobat, front and rear brake makes the Ventum One frameset a pretty good value.
Everything arrived within a week of the order. I then dropped the Ventum and my P3, still in my bike box post Ironman Lake Placid, at Empire Bikes in Monrovia, CA, handing my mechanic Jordan a 12 pack of Fat Tire and instructions to move my components from the P3 to the One while duplicating my measurements.
Components:
- Di2 electronic aero shifters, brake shifters, front and rear derailleur
- DuraAce crank, in 165mm and 52/36 chainrings. Will soon install a 53t for Kona
- 28-11 DA cassette, moving to 25-11 for Kona
- TTR front brake
- DuraAce direct mount rear brake
- Powertap G3 build by Wheelbuilder.com into a Reynolds Strike wheel
- Hed3 trispoke front wheel
- Cobb Triflow saddle
- Ventum water tank, in Endurance Nation red!
- Single rear Gorilla cage with Aero Pouch 300 tool setup.
- Look Keo pedals
Build Notes:
Jordan’s notes from the build was that the process was rather straight forward with the exception of cabling the front brake, as the routing makes a very tight turn.
I’ve since broken down and packed the bike a couple times, traveling to Ironman Wisconsin to support our athletes. The process is straight forward, especially if you follow Ventum’s helpful video on YouTube
Fit Notes:
I’m 5’9 with rather unexceptional body geometry. Jordan and I were able to exactly duplicate my fit on the P3 on the new One. I then made a few additional tweaks with saddle height, moved the saddle forward a bit.
Frame quality:
My first impression of the frame is that it’s extremely high quality and solidly built, with attention to detail. The thing just looks crazy fast and I personally have always preferred to have something different. The Ventum certainly fits that bill, turning heads wherever I go.
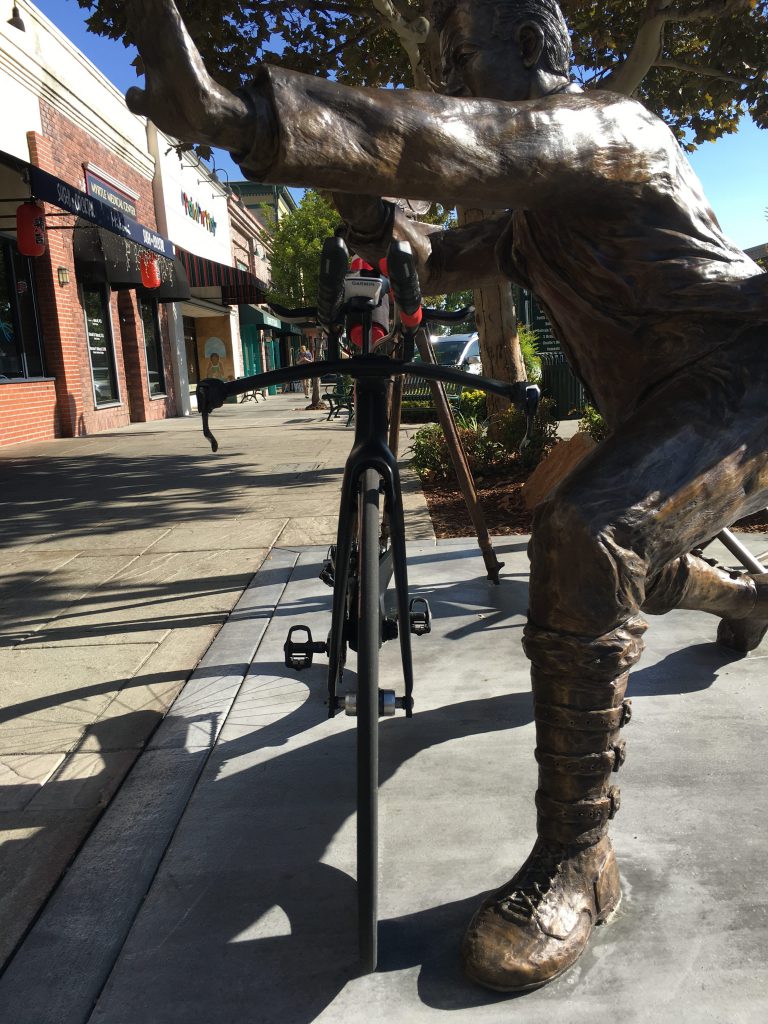
What the wind sees. Very clean and narrow
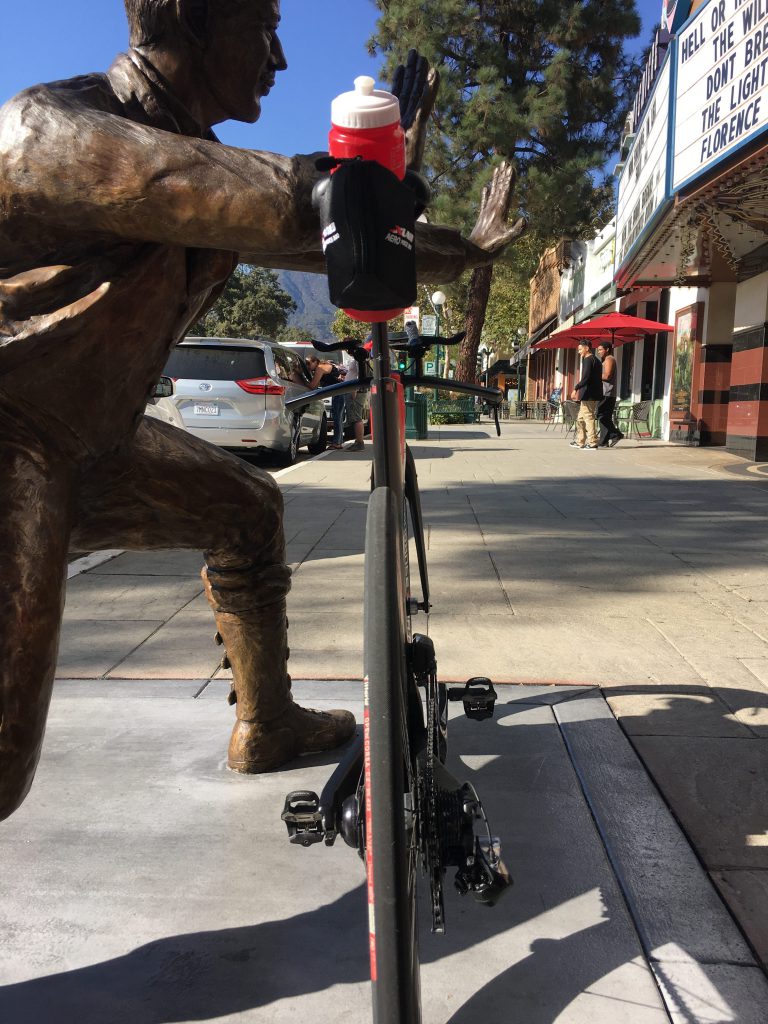
What the competition sees
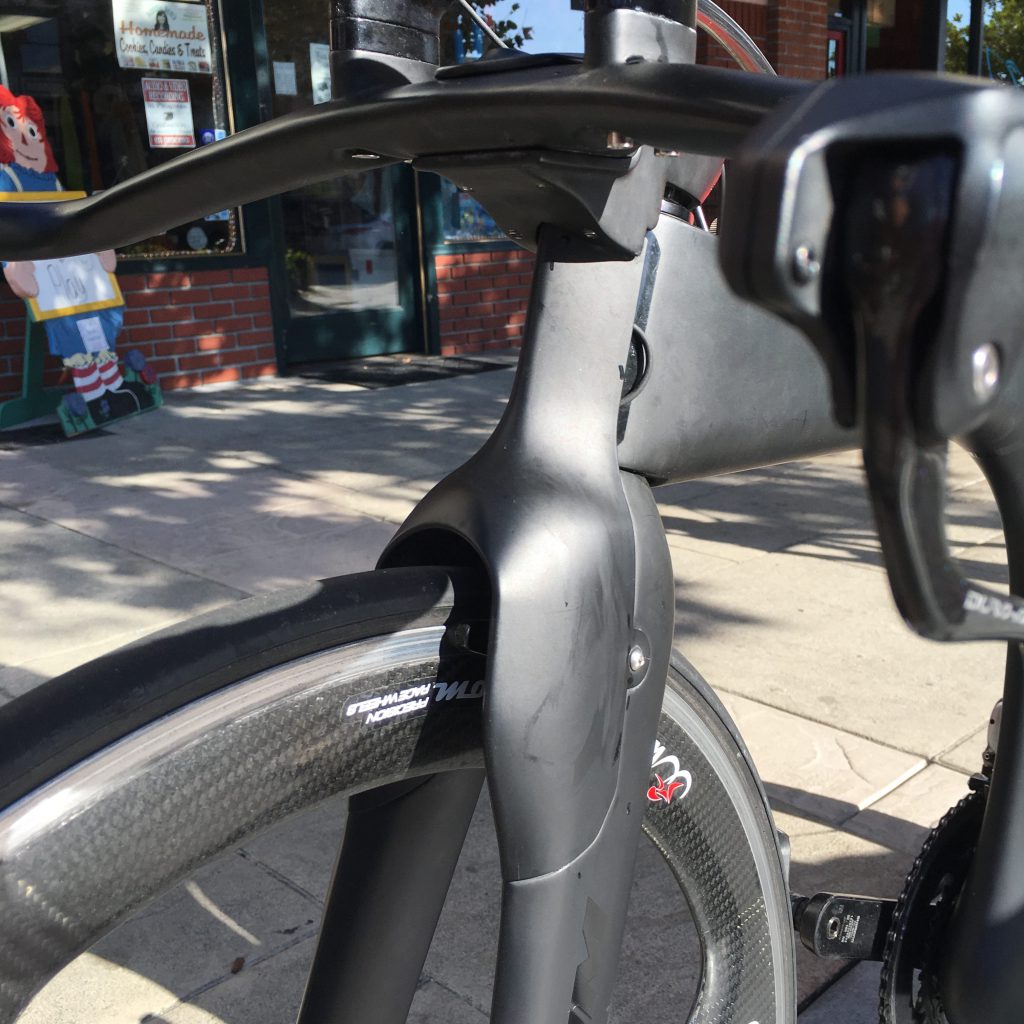
The easily removable front fairing hides the Di2 junction box, wiring, and front brake. Yes, I need to tuck in that wire!
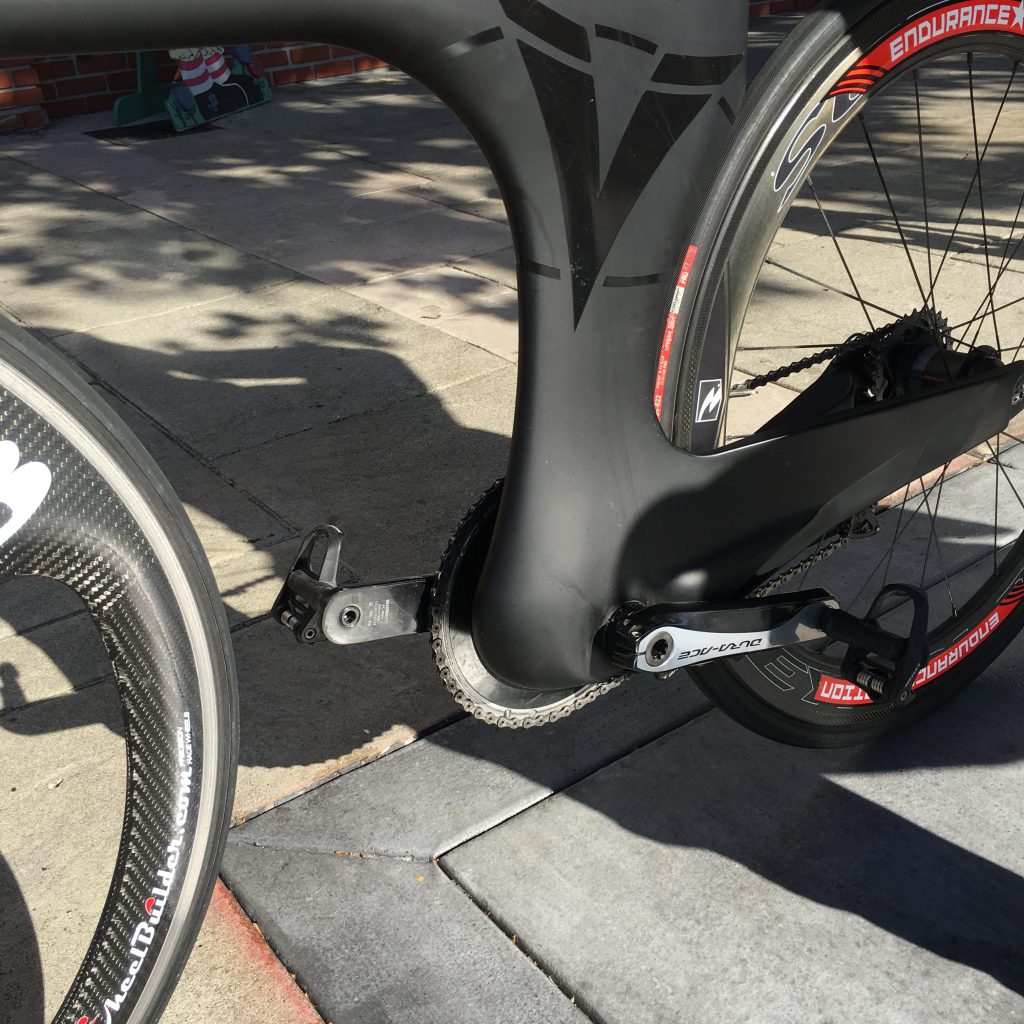
No downtube and a super beefy and aerodynamic bottom bracket area
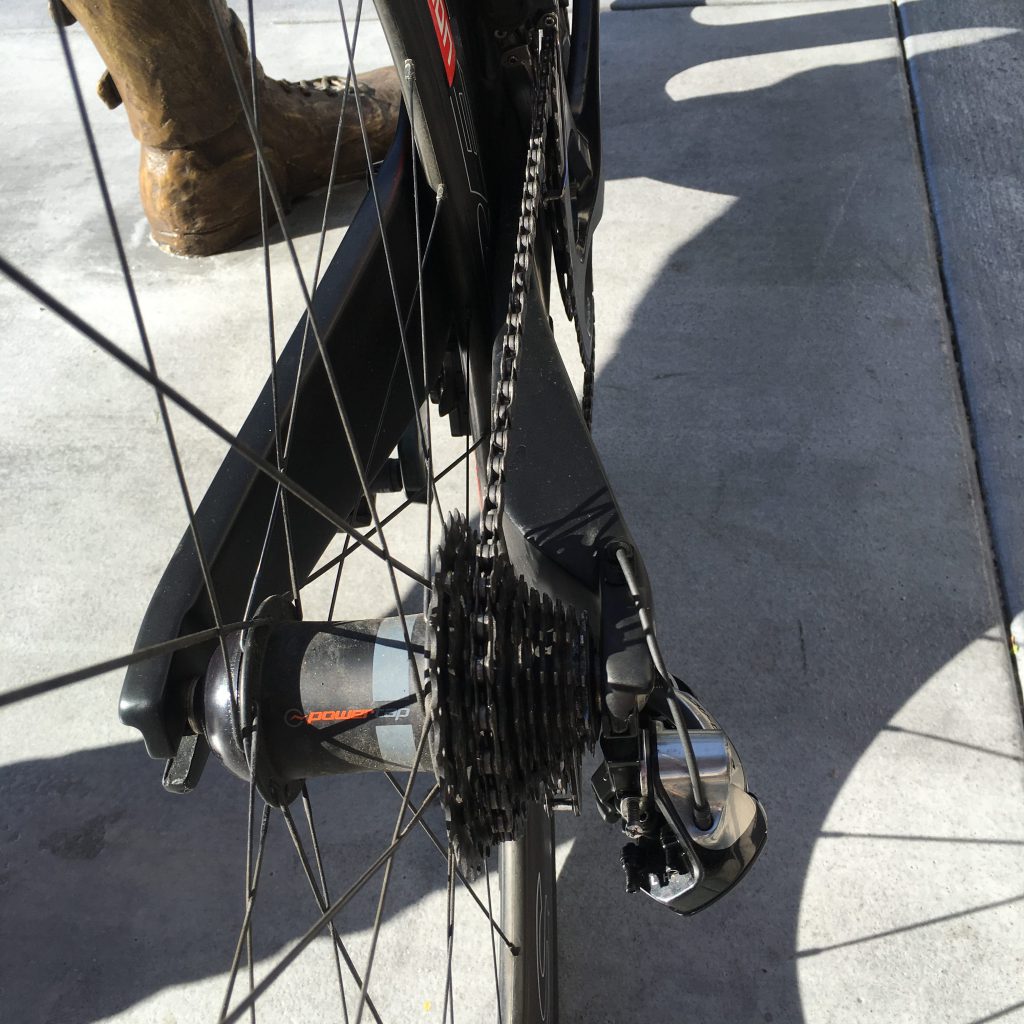
Note how the drive side chainstay tucks the cassette in and away from the wind
Ride quality:
The frame is plenty stiff with more than adequate power transfer when standing. I do a lot of technical descending and cornering, preferring a snappy, sports-car-like cornering experience, and the wheelbase of the Ventum provides that for me: extremely easy to initiate a turn, holds its line with no additional steering input, and no frame flex if I decide to stand out of the corner.
I ride on a variety of road surfaces and the frame does it’s job absorbing much of the vibration, though I have to admit that these days I dial in my tire pressure before a ride based on the expected road surface.
A few funny notes:
- It’s very strange at first to look down and see nothing between your lower legs, the front wheel and the pavement. You don’t realize how much you’re used to seeing a downtube down there until it’s take away!
- Likewise, very strange to check out the shadow of the bike next to you when riding in the early morning or evening. I tell myself I’m riding a high school geometry problem rather than bicycle.
- The absence of a downtube and seatstays can leave you scratching your head the first couple times you go to pick the bike up but, don’t worry, you’ll figure it.
Aerobars:
The Ventum aerobar complex of stem, base bar, and aerobars worked well for me and I was able to achieve my desired fit without any issues. Note that the base bar and/or aerobars can not be tilted upwards if you prefer to ride in a praying mantis type position. However, the bars have more of an upturn than the S-bends I ran on the P3 + TriRig setup and when I stack my hands (my preferred riding position) I probably achieve a similar forearm angle as I did on the P3.
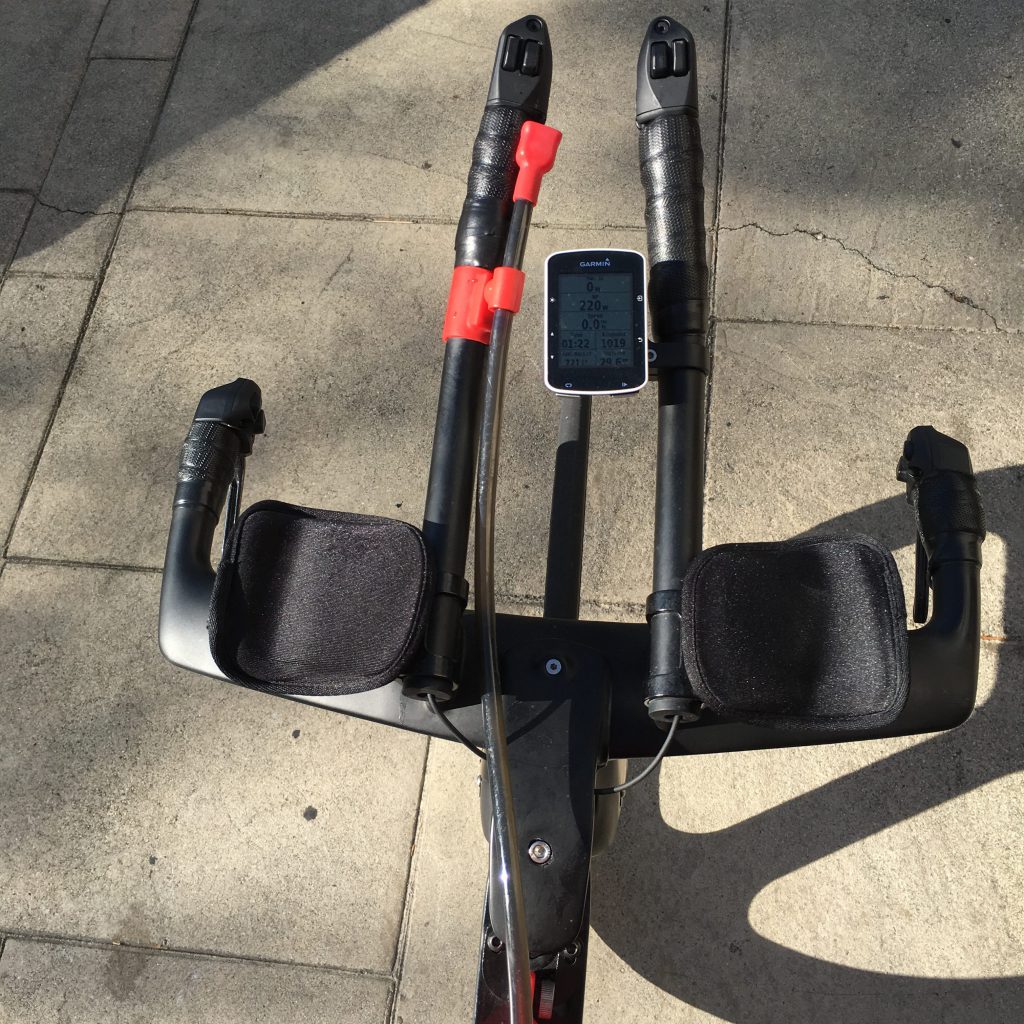
Ventum base and aerobars with proprietary stem. All Di2 and brake cables live behind the front fairing and are fed through the stem leaving a very clean, efficient, and cable-free setup
Other EN athletes have reported being unable to get the Ventum complex to work exactly for them and so they’ve used other setups, most commonly TriRig Omega bars and stem, to achieve their desired fit. The Ventum One uses a 1-1/8th steerer so that athletes can run any front end they wish. (Zipp, Enve, TriRig, Shimano). In every case, Ventum has been more than accommodating by working with these athletes to achieve their fit.
Brakes:
As an experienced motorcyclist and cyclist, who lives to go and corner fast on technical roads, brakes are very, very important to me. The combination of the TRP front back, DuraAce direct mount rear brakes, high quality brake pads, and meticulous attention to tire condition and pressure give me more than enough stopping power for every situation. Note the front fairing needs to be removed to access and make adjustments to the front brake. The fairing is very easy to remove by simply unscrewing 2 x 2.5mm hex bolts
The Water Tank:
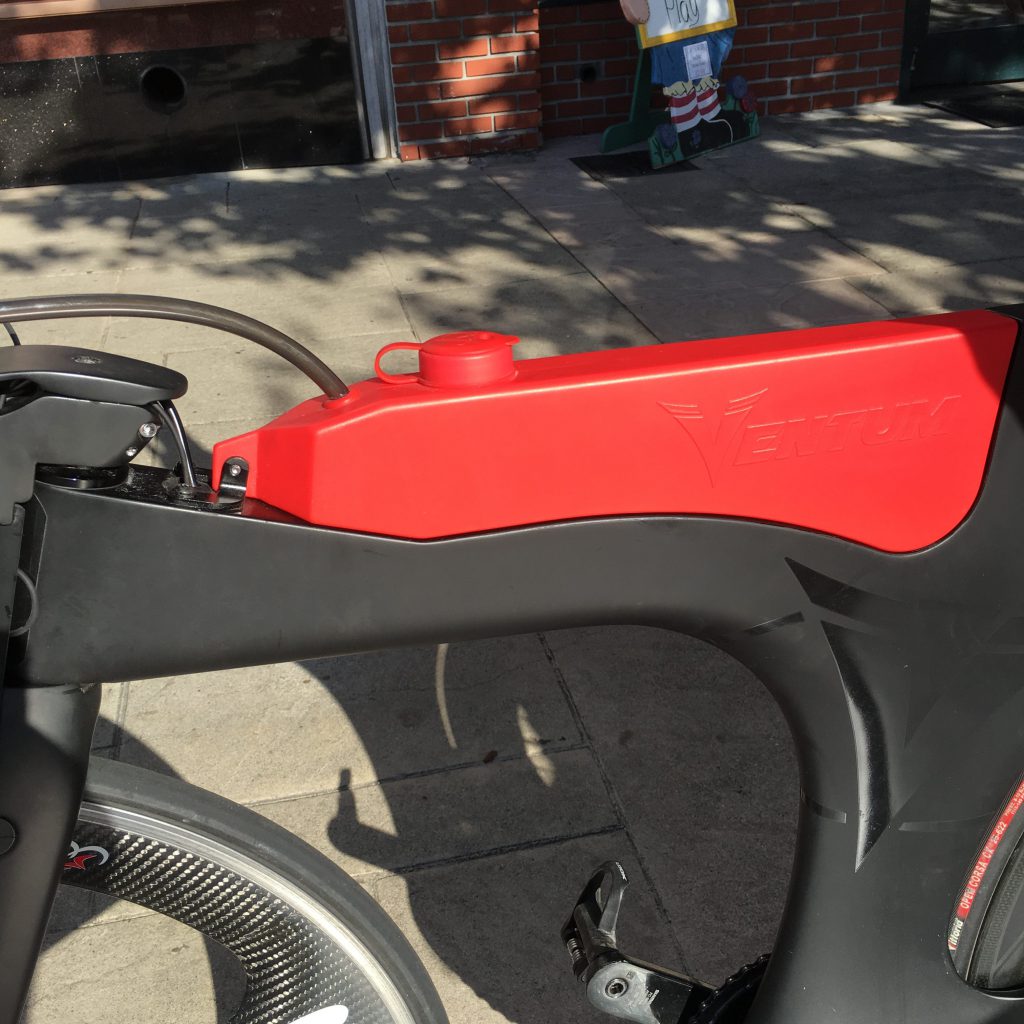
The optional top tube mounted water tank holds 41oz of fluid and removes or installs in seconds for easy filling or cleaning.
The water tank mounted on the top tube is one of the many unique features of the Ventum One and it can appear to be a bit gimmicky at first. However, it’s very trick and a great innovation. The tank holds 41 ounces of fluid, is secured by a simple button in the rear and a thumbscrew in the front, so that installation and removal is a 3-5 second operation at most. The straw can be positioned anywhere you like (I keep the bite valve just under the resting position of my left hand) and is held in place by a magnet mounted to my left aerobar. Drinking is dead simple: lift straw to mouth, drink, open up the bike valve a bit to let some air in and push water out of the end of the straw, let the tube drop and 95% of the time it finds it way home to the magnet all by itself. The cap for filling the tank is right between your legs and very easy to operate on the fly.
Note that if you don’t do the bit valve trick above, the valve can leak a bit of fluid, especially on a bumpy road. Not a problem for me, as I only drink water, and get calories and sodium from blocks and gels.
The water tank plus one rear bottle cage gets me 65 ounces of fluid, or about 2hrs worth on a training ride, and more than enough fluid space for a long course triathlon with aid stations about every 10 miles. I personally don’t see a need to mount another BTA setup.
Customer Service:
In my opinion, this is where the Ventum truly separates itself from the crowd. The early Ventum adopters on our squad have been our extremely knowledgable, and picky, athletes. Pretty much all of these folks know more about bikes and their rides than I do, and I have no doubt that I was probably Ventum’s easiest customer. However, the overwhelmingly common and consistent theme in everyone’s interaction with Ventum — from ordering, to delivery, to answering build questions, to accommodating individual component preferences, and more — has been 100% positive. When you work with Ventum to begin to even consider purchasing a One, it will become immediately clear that you’re dealing with a company who is committed to providing a cutting edge product and cutting edge customer service.


Leave a Reply